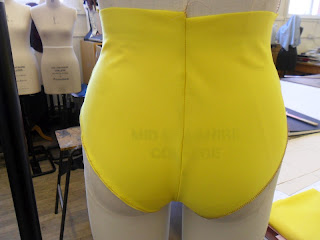
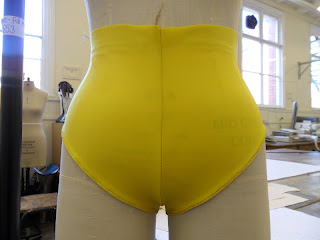
Today I have been constructing my Orb Weaver Shorts. I had already patterned them on a previous day but here is the process that I have been through so far.
To create my patterns I used a leggings/stretch block.
I only traced of the block to part way down the thigh as I didn't need it any longer than this.
Then I used the mannequin to measure the length of the shorts down the outside and inside leg and then drew on the new hem line.
I then checked to see the shape of the shorts on the mannequin. I was really pleased with the silhouette and I think that the shape will work really well.
As I am using lyrca the best way to sew the seams is to overlock them so I had to reduce the seam allowance to 0.5cm.
I cut out my pattern pieces and decided that I would add a side seam so I cut the pattern pieces along the fold (this meant that there was no seam allowance but I thought I would see how they turned out)
I overlocked the pieces together down the centre front, centre back, the seam at the crotch and side seams.
I noticed that there was a little hole where part of the fabric hadn't been caught in. To fix this problem I went back in with the overlocking making sure that I cut some off in order to catch it in.
As the waist was baggy I turned the shorts inside out and fitted them to the mannequin by taking them in at the seams.
I then market these adjustments onto my patterns.
One problem I had was a slightly bubbling along the centre back seam, this was due to a curve in the overlocking so I went back in and smoothed the overlocking out to make this area lie flat.
I wasn't pleased with the shape of leg holes so I addapted these slightly on both my toile and my patterns.
The next step was to finish the leg holes to do this I overlocked them then I folded the edge under and top stitched them.
One problem I had was that the leg holes were slightly raised away from the mannequin but as it isn't much I believe that this will lie flat on a pesos body.
The next step is to finish the waist line.


No comments:
Post a Comment